Adorning your walls with art transforms your space into a sanctuary, instantly lifting its atmosphere with an undeniable charm. Gazing upon pieces you cherish daily is an investment well worth making! Beyond mere decoration, artwork enriches your surroundings, breathing life into dull walls and bestowing upon your home a sense of completion.
Imagine walking into a room where the walls tell a story of beauty and charm, instantly lifting the atmosphere and creating a sanctuary within your space. Investing in wall art means surrounding yourself with pieces you love, enriching your daily experience. Not only does artwork elevate your space, but it also adds value to your home by transforming dull walls into a polished, finished look.
Feeling overwhelmed by the task of choosing and arranging wall art? Unsure whether to opt for a single large piece or a collection of prints? Wondering about the right size or how to match art to your color scheme? With countless options available, it's easy to feel lost.
But fret not! You've found the perfect place to guide you through this journey. Our step-by-step approach will help you select the ideal wall art for your home. Keep reading for expert tips on choosing and arranging art that will breathe new life into your walls.
Step 1: Assessment
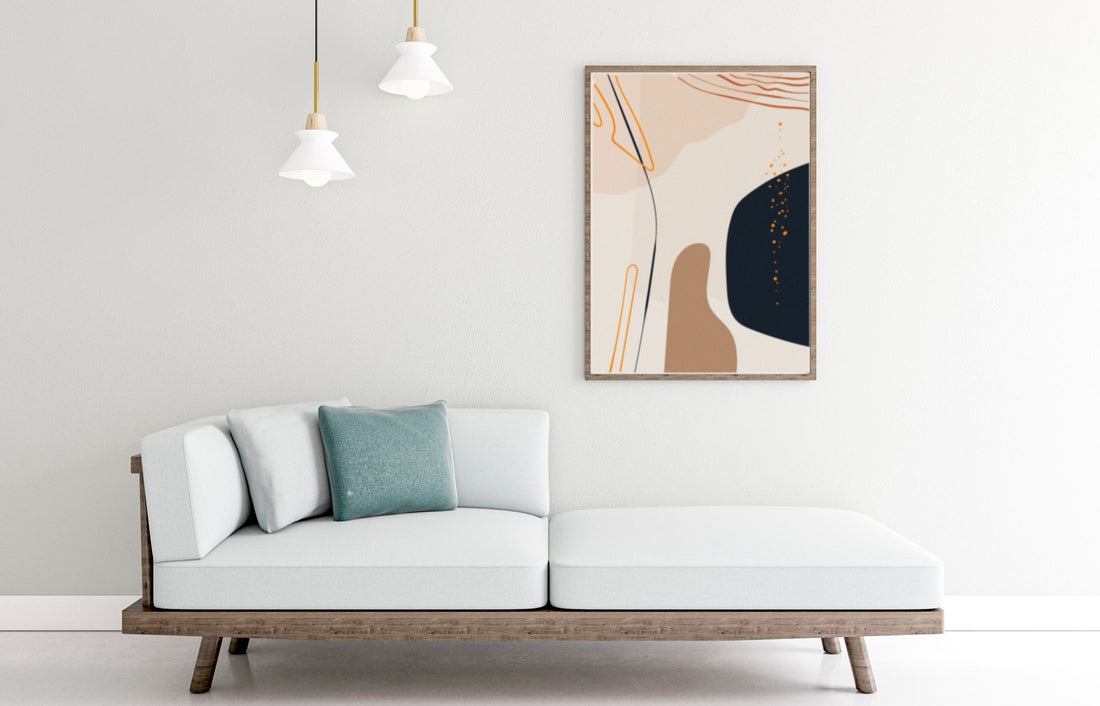
Picture this: you walk into your living room, and your eyes land on a blank wall just waiting to be adorned with beauty. The first step is to assess the space and decide where your masterpiece will shine. Whether it's above your cozy sofa, in the foyer to greet guests with warmth, or even in the bathroom for a touch of unexpected charm, the possibilities are endless!
Consider the layout that speaks to your soul. Are you drawn to the storytelling magic of a gallery wall in the living room? Perhaps a bold, large-scale print in the bedroom to captivate the senses and ignite the imagination? Or maybe a playful grid of family snapshots to celebrate cherished memories? The choice is yours, so let your creativity run wild!
Need a little inspiration to kickstart your imagination? Feast your eyes on these delightful photos showcasing the endless possibilities of wall art.
 |
 |
Now that you've determined the location and layout for your wall art, it's time to select the perfect size (or sizes!) for your space. To start, consider the dimensions of the area where you plan to display the artwork and envision how it will fit within the space. You can use masking tape to outline the size on the wall and visualize the scale.

Here are some common size options to help you understand the scale of artwork when making your selection:
• Oversized Wall Art: 1 meter or larger (40 inches) Make a bold statement with oversized artwork that commands attention and fills a space. These larger-than-life pieces are perfect for hallways or expansive walls behind furniture like a dining table, bed, or sideboard.
• Large Wall Art: 70 - 100 cm (28 to 40 inches) Create a focal point in your room with large-sized artwork that can be hung above most furniture in your bedroom, living room, or dining area. Lean them against a sideboard or table for a standalone look, or incorporate them into a gallery wall for added impact.
• Medium Wall Art: 50 - 70 cm (20 to 28 inches) Perfect for pairing with other artworks, medium-sized pieces also shine as focal points in a gallery wall. Consider arranging them in sets of two or three for a cohesive look.
• Small Wall Art: 30 - 50 cm (12 to 20 inches) Ideal for showcasing family photos or grouping together, small-sized artwork adds charm to any space. Combine them with other sizes in a gallery or grid layout for a stunning visual display.
• Mini Wall Art: 20 to 30 cm (8 to 12 inches) Add a touch of personality to your bedside table, hallway console, or office desk with mini-sized artwork. These petite pieces are also perfect for creating a gallery wall alongside larger prints.
Consider these size options carefully to ensure your wall art complements your space and decor style perfectly.
Step 3: Option 1 / Choose by style or theme

Your wall art should reflect your personal style and the ambiance you want to create in your space. Think of your walls as an expression of your unique taste and personality, or select artwork that brings you joy. By now, your home likely has a defined style, making this step easier! You can either stick to a cohesive style or mix and match for an eclectic look, depending on your preferences.
For a serene and peaceful atmosphere, consider pastel abstract prints or bohemian-inspired artwork. If your space boasts bright, airy interiors, Hamptons-style pieces can infuse a cool coastal vibe. Minimalist spaces can benefit from abstract prints or sleek illustrations that complement the modern aesthetic. For a more personalized touch, explore custom art options such as prints featuring your first date song, custom map designs, bespoke bus stop scrolls with your favorite locations, or family photo collages.
Select pieces of art that speak to you and enrich the atmosphere of your home, crafting a space that authentically mirrors your individual style and personality
.
Step 3: Option 2 / Choose by color

Choosing the perfect color palette for your space can set the tone and mood of your room. Whether you're sticking with your existing color scheme or embarking on a fresh redesign, let's delve into the world of color and find the hues that resonate with you.
Instead of being confined to your current color scheme, consider exploring new shades that complement and enhance your space. For a bold statement, opt for rich, dark tones that command attention. Alternatively, if you crave tranquility, soft neutrals, blush, or earthy tones can create a serene atmosphere.
Let's take a closer look at some color schemes inspired by the color wheel:

- Analogous Colors: These are three colors adjacent to each other on the wheel, such as blue-violet, blue, and green. Combining analogous colors creates a harmonious blend, offering a seamless transition of hues.
- Complementary Colors: Opposite colors on the wheel, like yellow and violet, create a striking contrast that makes each color pop. Utilizing complementary colors can make your wall art stand out against the backdrop of your room.
- Split Complementary Colors: This technique involves choosing a base color and selecting the two colors adjacent to its complementary color. For instance, pairing an earthy yellow with blue-violet and red-violet creates a vibrant yet balanced palette.
- Monochrome Palette: If you prefer a timeless and minimalist approach, consider a monochrome color scheme of classic black and white. This sleek and modern palette adds sophistication to any interior space.
To ignite your creativity, delve into a myriad of online platforms or user-friendly mood board creators where you can seek inspiration and visualize your color palette. Explore mockups, design communities, and curated examples across various styles to refine your color scheme and bring your vision to life.
Step 4: Consider the Mood and Atmosphere
Now that you've determined the location, size, style, and color palette for your wall art, it's time to consider the mood and atmosphere you want to create in your space. Think about the emotions you want to evoke when entering the room. Do you want a sense of calm and tranquility, or are you aiming for a more energetic and vibrant ambiance? Select artwork that aligns with the desired mood, whether it's serene landscapes, bold abstracts, or whimsical illustrations.
Consider how different styles, colors, and compositions can influence the atmosphere of your room. For example, serene landscapes with soft, muted tones can evoke a sense of peace and relaxation, while vibrant abstracts with bold colors can inject energy and excitement into the space. Pay attention to the overall vibe you want to achieve and choose artwork that resonates with that vision.
Step 5: Think About Framing and Presentation

After selecting your artwork, consider how you want to present it. Will you opt for traditional framed prints, canvas wraps, or something more unconventional like floating frames or acrylic mounts? The framing and presentation style can significantly impact the overall look and feel of the artwork, so choose an option that complements both the artwork itself and your decor style.
Explore different framing options and consider how they enhance the visual impact of the artwork. A sleek, minimalist frame can complement modern artwork, while a vintage-inspired frame can add character to more traditional pieces. Think about the overall aesthetic you want to achieve and select framing that enhances the artwork without overpowering it.
Step 6: Pay Attention to Composition and Placement
When hanging your wall art, pay attention to composition and placement to ensure maximum impact. Consider the visual balance of the room and aim for symmetry or asymmetry, depending on your preference. Experiment with different arrangements and layouts before committing to a final placement. And don't forget to consider eye level – artwork should ideally be hung at eye level for optimal viewing.
Think about how the artwork interacts with other elements in the room, such as furniture, lighting, and architectural features. Consider the flow of the space and how the artwork can enhance the overall aesthetic. Take your time to find the perfect placement for each piece, ensuring that it enhances the atmosphere and creates a cohesive look.
Step 7: Personalize with Accessories and Accents

To truly make your wall art your own, consider personalizing it with accessories and accents. Add decorative elements like wall sconces, shelves, or plants to complement and enhance the artwork. You can also incorporate meaningful objects or photographs to create a gallery wall that tells your unique story. Experiment with layering and texture to add depth and dimension to your space.
Think about how different accessories and accents can enhance the visual impact of the artwork and create a cohesive look. Consider incorporating elements that reflect your personal style and interests, whether it's a collection of vintage books, a gallery of family photos, or a display of cherished mementos. Let your creativity guide you as you personalize your wall art and create a space that feels uniquely yours.
Step 8: Regularly Refresh and Rotate
Finally, don't be afraid to regularly refresh and rotate your wall art to keep your space feeling fresh and inspiring. Swap out artwork seasonally or whenever you feel like a change, allowing you to continually reinvent and reinvigorate your home decor. By embracing change and staying open to new possibilities, you can create a space that evolves with you over time.
Now that you've explored the joy of selecting wall art, unleash your creativity and embark on choosing pieces for your home. Embrace the process, experiment with various styles, and enjoy the journey until you achieve the perfect look. With wall art becoming increasingly affordable, our diverse range offers trendy and stylish options for every budget. Consider opting for unframed art prints and poster frames for versatility. Whether browsing local thrift shops for unique finds or exploring different avenues, prioritize pieces that resonate with you. Remember, your home reflects your personal style, so choose art that brings you joy and let your individuality shine through!